
Zero Trust essential configuration + real demo of the script approval flow
In the aftermath of the Stryker incident earlier this year, enabling Intune’s Multi-Admin Approval feature (MAA) has become a non-negotiable Zero Trust control. If you’re not familiar with what happened, threat actors gained access to Intune and were able to execute mass wipe commands against Windows endpoints.
In an era of AI-powered attacks that are getting more creative about causing downtime and extortion, ask yourself: Is a full device wipe scenario clearly defined in your disaster recovery and business continuity plans? Was it ever a primary consideration?
As organizations continue moving endpoint management to Intune as a cloud-native platform, this gap needs to be closed. That’s where MAA comes in. Enabling it isn’t just a recommendation — it’s essential. MAA enforces multi-admin approval for a wide range of changes in Intune. Here’s what’s currently supported:
- ✅ App deployments (note: does not apply to App Protection Policies / MAM)
- ✅ Compliance policy creation & changes
- ✅ Configuration policy creation & changes
- ✅ Device delete action
- ✅ Device wipe action
- ✅ Role permission & assignment changes
- ✅ Scripts & remediations (Windows only)
- ✅ Tenant configuration – Device Category creation & changes
The supported resources are specific, so I strongly encourage you to review the official Microsoft documentation for the latest details: Use Multi Admin Approval in Intune
Let’s walk through the setup using Scripts as our example. This is one of the most valuable policy types because approvers can finally see the actual PowerShell script content before approving.
Prerequisites for MAA
Before you begin, make sure you have:
- At least two administrator accounts in the tenant.
- By default, administrators participating in MAA workflows need an Intune license assigned to their account. You can allow unlicensed admins by enabling Allow access to unlicensed admins under Tenant administration. Important: This setting is irreversible once enabled.
Step 1: MAA Permissions
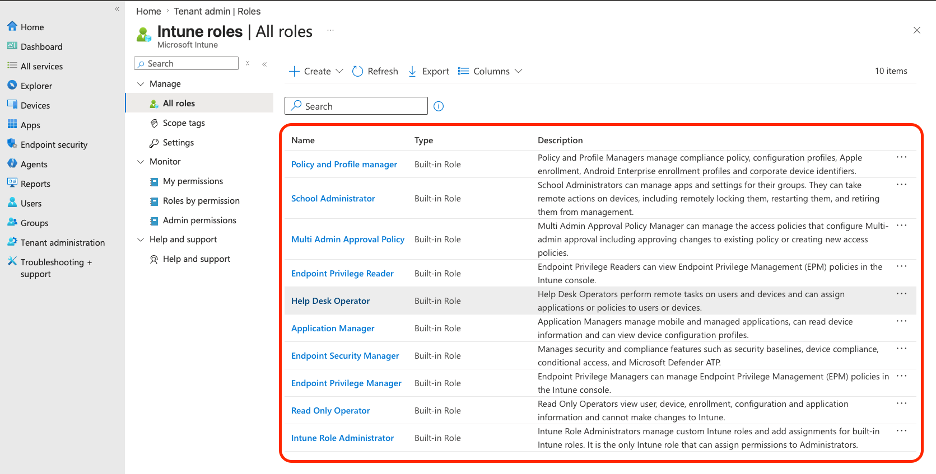
To create MAA Access Policies, you need either the Intune Administrator role or a custom Intune role that includes these specific permissions:
- Create access policy
- Read access policy
- Update access policy
- Delete access policy
You can review and manage roles under Tenant administration > Roles. This is also where you’ll build custom roles or assign users to built-in roles.
Step 2: Prepare the Approver Entra Security Group
Next, create an Entra ID security group containing the users who should be able to approve changes. (Note: This must be a security group — Microsoft 365 groups and distribution lists are not supported for MAA approvers.)
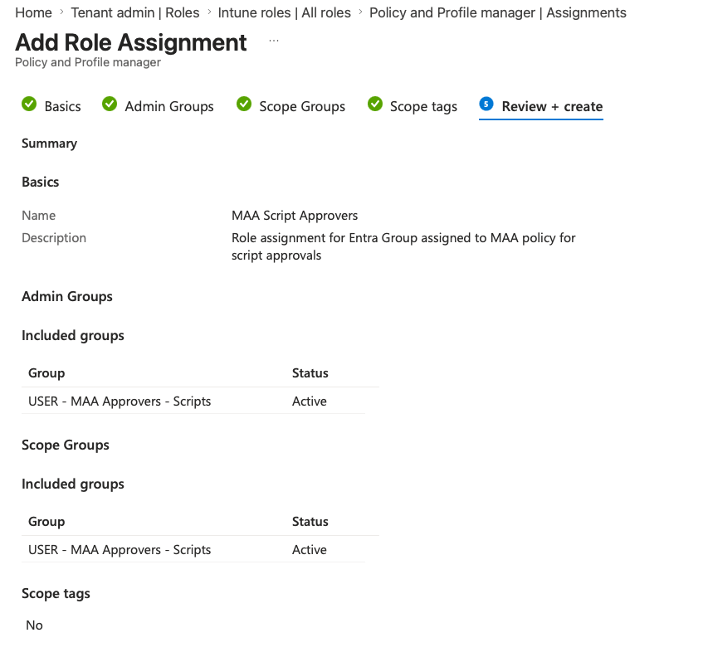
Once the group exists, assign it to an Intune role so it has the necessary permissions. We’ll use the Policy and Profile Manager role for this example.
Navigate to Tenant administration > Roles, select the Policy and Profile Manager role, then go to Assignments > + Assign and configure:
- Name: MAA Script Approvers
- Description: Role assignment for the Entra group used in the MAA policy for script approvals
- Admin Groups: Assign your Entra security group
- Scope Groups: Assign the same Entra security group
- Scope tags: None
Step 3: Create the Access Policy
Go to Tenant administration > Multi Admin Approval > Access policies > + Create.
Configure the policy with these settings:
- Name: Script MAA Access Policy
- Description: MAA policy for script approvers
- Policy type: Script
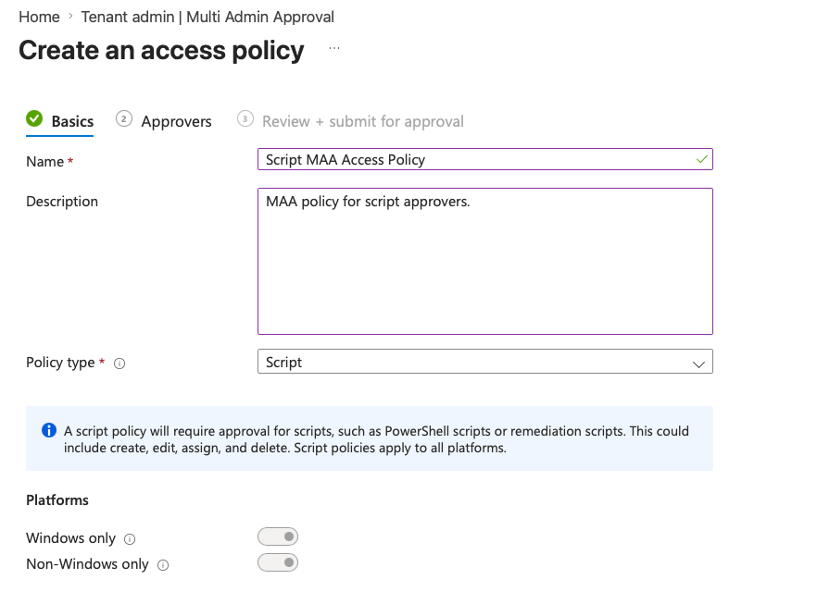
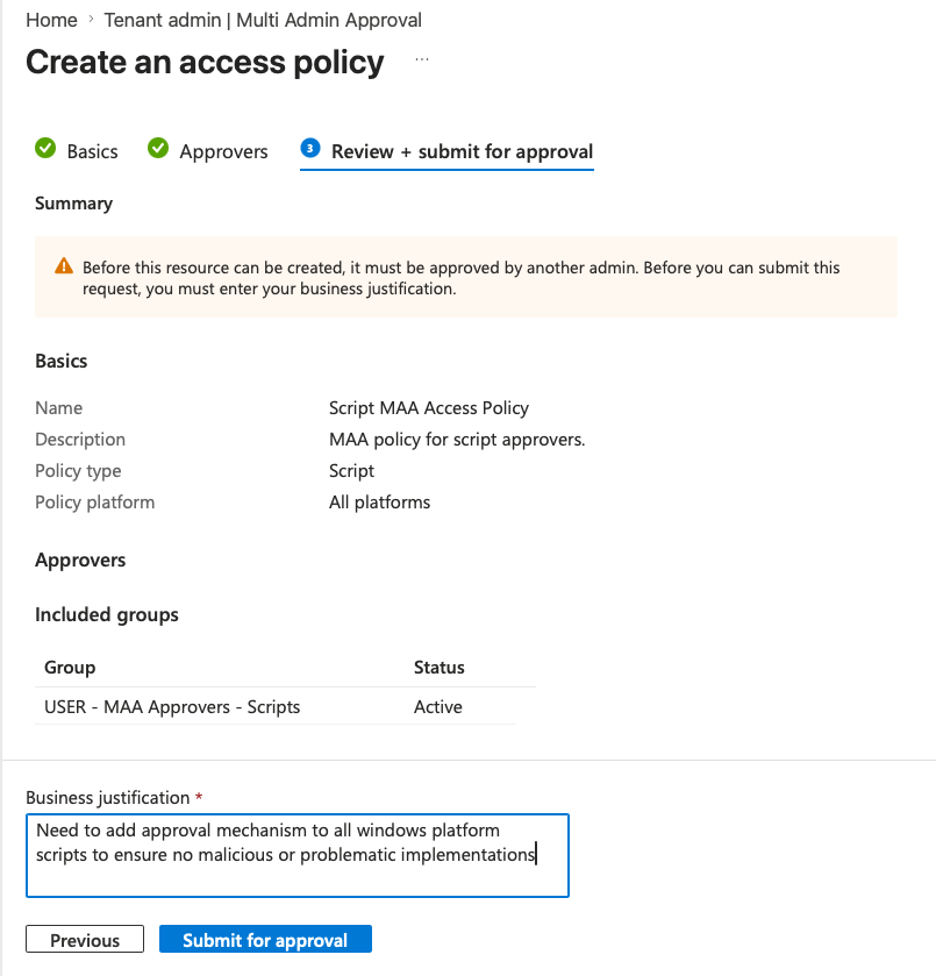
Assign the Entra security group you created in Step 2 as the approvers, then click Next.
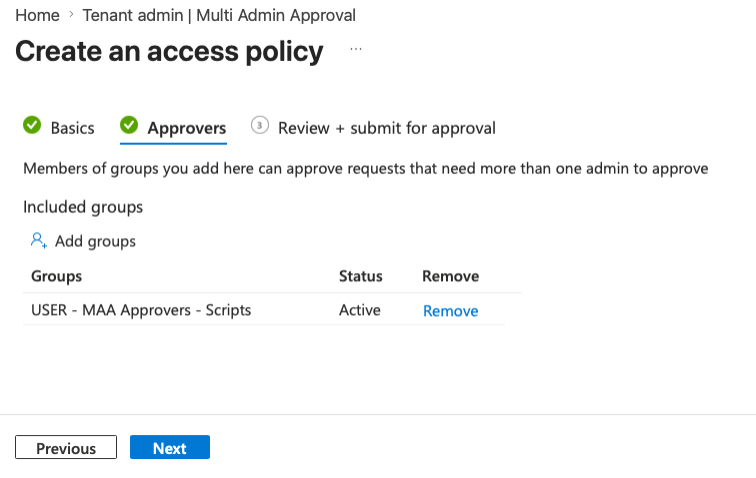
On the final screen, provide a business justification for the policy. Because this is your first access policy (or any change to access policies), it will require approval from another Intune admin with the appropriate MAA permissions before it takes effect.
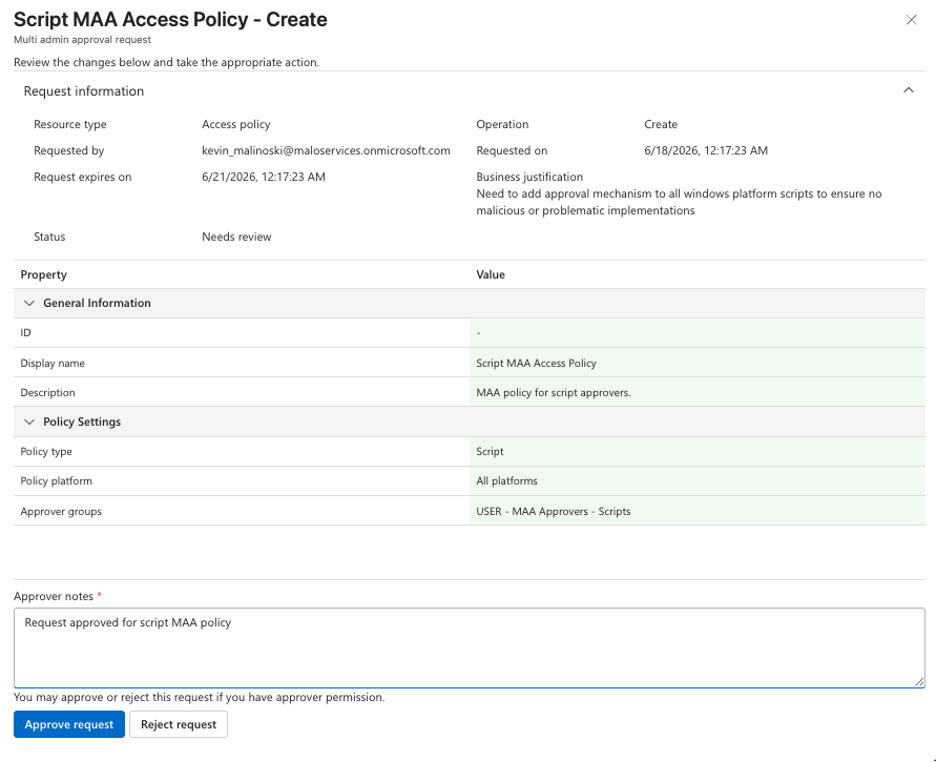
Step 4: Approve and Complete the Access Policy
This is where most people get tripped up.
Approve: Another Intune admin must review and approve the access policy request. They’ll navigate to Tenant administration > Multi Admin Approval, find the request flagged as Needs Review, review it, and either approve or deny it (with optional notes).
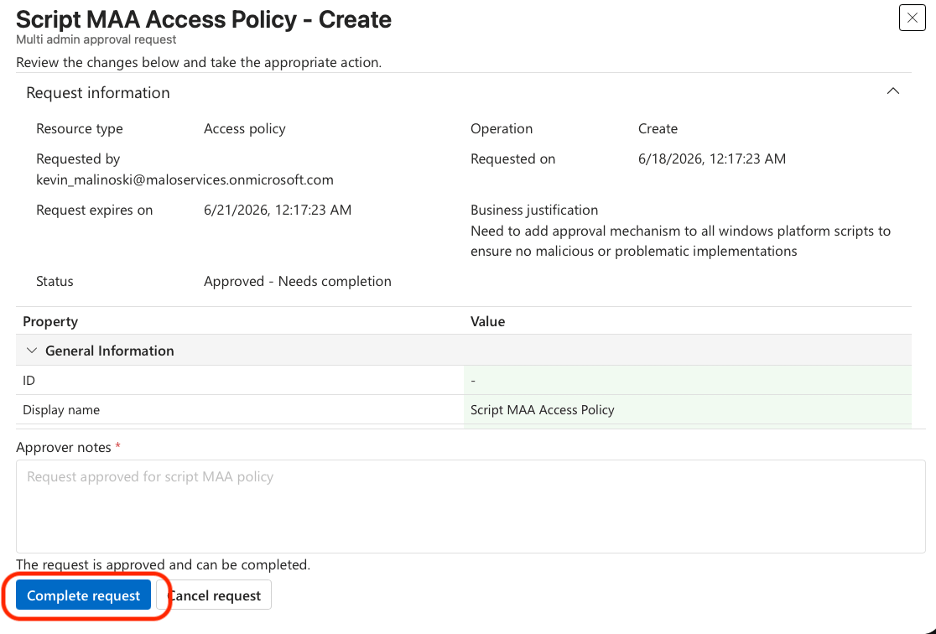
Complete: Even after approval, the change isn’t automatically active. The original creator must go back into their admin portal and complete the request for the policy to take full effect.
Wrapping It All Up
You now have an active Access Policy enforcing MAA on all Windows remediation and platform scripts. (Note: macOS platform scripts are not covered by MAA at this time.)
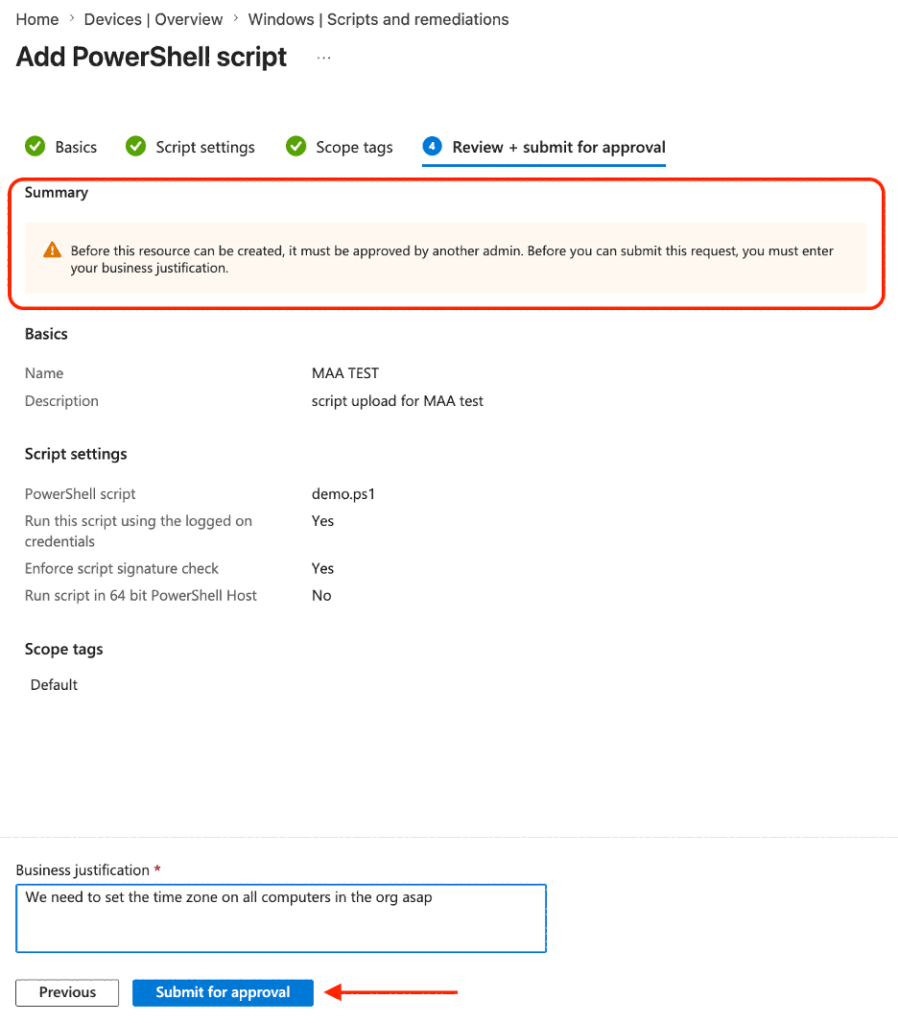
When an admin creates or modifies a script, they’ll see a new warning and must provide a business justification:
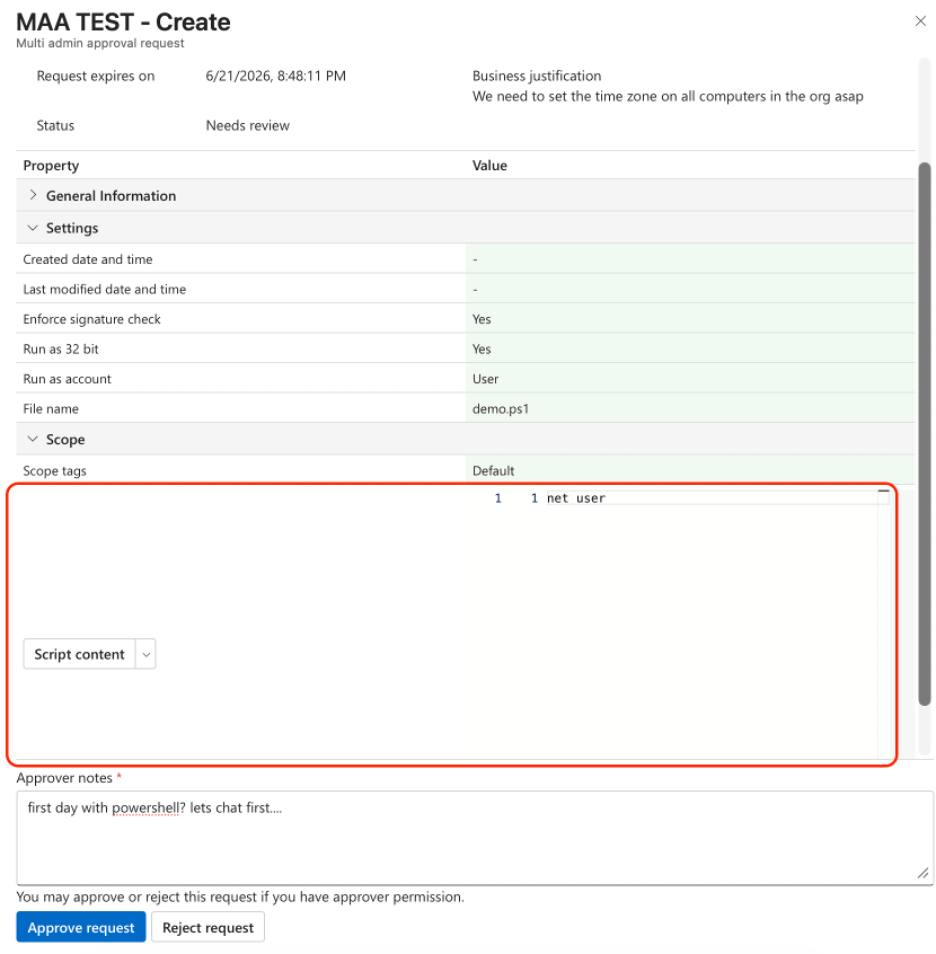
Before the script can be assigned, it must go through MAA approval. One of the best parts of this workflow is that approvers can now easily view the actual contents of the Windows PowerShell script directly in Intune before making a decision:
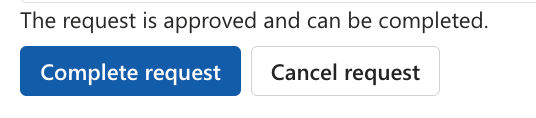
Once approved, the originating admin still needs to complete the request before the script becomes available in Intune:
Now the script is ready for assignments — and every future change will follow the same multi-admin process. Be prepared to build extra verification steps into your change management plans and device lifecycle processes.
Final thoughts…
When you enable MAA, Intune administration becomes more of a coordinated dance. We don’t have granular controls yet, and it’s not perfect — but it adds a much-needed “trust, but verify” layer between Intune admins. No more pleading ignorance about unsanctioned or rushed changes. No more information silos or shadow IT.
Most of us have moved a large portion (or all) of our endpoint management to Intune. It’s essentially a publicly accessible AD and Group Policy management system for the cloud era. In a true Zero Trust world, MAA is non-negotiable.
Have you enabled MAA in your tenant yet? Drop your thoughts in the comments — good or bad. The community voice really does drive improvements at Microsoft, so let’s hear it.

Leave a comment