
If you’ve been following along this month, you already know the story: we’ve spent the entire month of April diving deep into Assigned Access—the Windows 11 technology that powers reliable, locked-down kiosks for public-facing, frontline, and general-use devices. From the very first kickoff post (where we looked at why the old Intune Kiosk Templates don’t cut it anymore and introduced the XML-based Assigned Access approach) through development tips and tricks, a full video walkthrough of local XML testing, an exclusive interview with Nick from Microsoft’s Intune engineering team, a deep dive into complementary CSPs and Settings Catalog policies, and even a quick detour to the Boston Workplace Ninjas user group meetup, it’s been a packed month.
I didn’t expect this series to gain the traction it has, but I’m genuinely grateful. The original kiosk mode post from last this year remains one of the most-read articles on the blog, and I’ve heard from so many of you—IT admins, MSPs, and engineers—who are out there wrestling with the same real-world challenges I’ve faced over the last three to four years. Many organizations have quietly given up on Windows 11 kiosks because the documentation feels scattered and the abstractions keep piling up.
That’s exactly why I wrote this series: not to sell you on anything, but to help you understand the why behind how Assigned Access is designed to operate so you can implement it with confidence instead of long-term assumptions.
Today we’re closing out the month by connecting every piece we’ve covered into one clear, repeatable three-phase process. Think of it as your personal roadmap:
Phase 1 – Slow down and validate locally (the “getting to know” phase).
Phase 2 – Lay the proper Intune foundation once (the groundwork that prevents future headaches).
Phase 3 – Unlock true zero-touch velocity (deploy new kiosks quickly, confidently, and at scale).
The beauty of this process is that the first two phases are an investment you make once. Do them right, and Phase 3 becomes fast, repeatable, and low-maintenance. That’s the velocity every kiosk-loving admin is really after. No more babysitting devices or rediscovering the same painful lessons on every new rollout. Let’s walk through it together.
Phase 1 – The “Let’s Not Rush This” Phase: Getting to Know Assigned Access (Local Testing First)
Every solid relationship starts with a proper getting-to-know-you phase, and Assigned Access is no exception. Before you introduce Intune, AutoPilot, or any of those fancy cloud abstractions, you need to spend some quality time together—just the two of you, no pressure, no audience.
If you haven’t already, start with the very first post in this series (linked below). It’s all about testing on a local workgroup machine with zero extra layers. That’s your foundation.
Here’s the exact process I still follow:
- Provision a fresh Windows 11 Pro machine with a local admin account. Do not join it to Entra ID or AutoPilot yet.
- Build it out exactly like your target kiosk image: manually install every app, test them under a regular user profile, and make sure the basics actually work.
- Keep the OS fully patched—24H2 is reliable, but I’m running 25H2 because Microsoft keeps quietly fixing Assigned Access gremlins.
- Skip the Settings app kiosk wizard. It’s quick and easy, but it won’t teach you the XML—and the XML is where the real magic (and the real troubleshooting) happens.
Grab my public GitHub repository of production-ready XML templates. These are formatted the way I actually use them in the field, complete with comments. Start here if you have never built an XML – in this blog post I review how to apply the Assigned Access XML with Powershell.
Want to really learn it and have a GUI to guide you through the process? Download the Assigned Access Designer tool from Nick @ Mostly Compliant Endpoint. I interviewed Nick (a Microsoft engineer) and he built a fantastic open source tool—highly recommended checking out the interview linked here if you have not already!
When things don’t go smoothly:
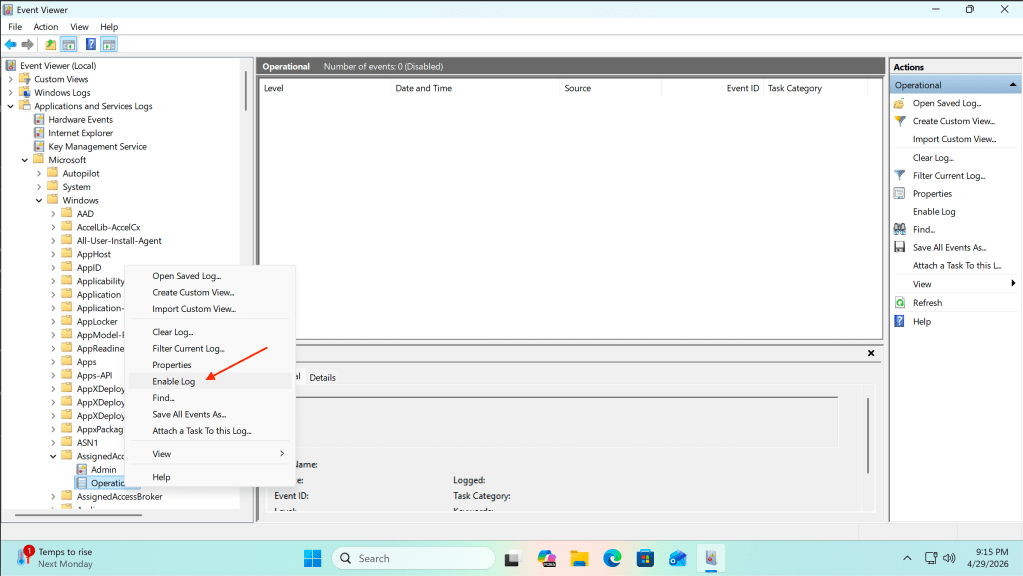
- XML won’t apply → Event Viewer > Application and Services Logs > Microsoft > Windows > AssignedAccess > Operational > Enable Log. This will log errors if your XML is not applied successfully → this is usually because of missing AllowedApp references or sneaky XML syntax issues.
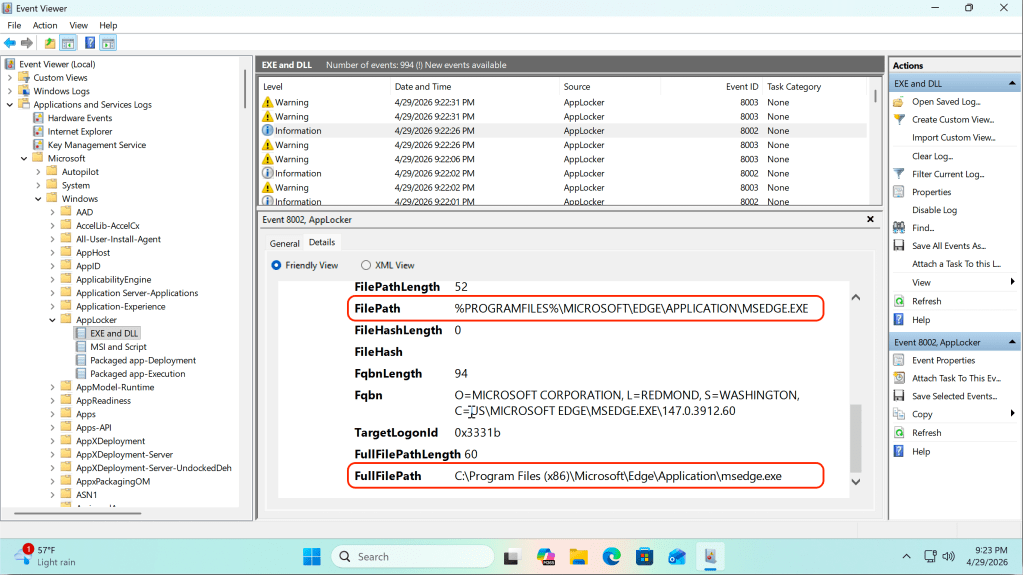
- Apps won’t launch inside kiosk mode → Event Viewer > Application and Services Logs > Microsoft > Windows > AppLocker > EXE and DLL / MSI and Script (the first two channels are gold). These will show warnings for single-app mode and errors for blocked applications in multi-app mode; auto-updating apps love spawning helper processes that need to be explicitly added to the AllAppsList/AllowedApps.
Take this phase seriously on a local machine and you’ll avoid weeks of frustration later. It’s the difference between “it worked once in the lab” and “it works every single time.”
Phase 2 – Set the Stage: Preparing Intune So Assigned Access Can Actually Shine
This is where even seasoned Intune admins trip. The temptation is strong: “XML works locally? Great—drop it in AutoPilot and we’re done.” That mindset has cost me multiple keyboards.
Assigned Access lives in its own protected bubble. Microsoft injects a specific set of CSPs automatically when the device enters the mode. Pile on extra policies and you’re playing Russian roulette with silent conflicts.
My practical recipe (this is the groundwork that unlocks everything after it):
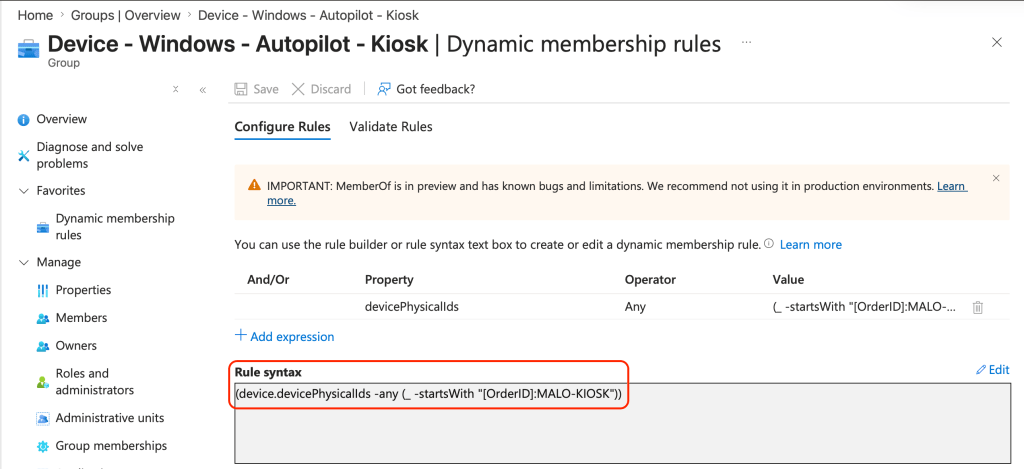
- Dedicated Kiosk Entra ID Dynamic Device Group for kiosks (I utilize a group tag prefix of “MALO-KIOSK”) – this allows me to scale my deployments with relative ease – take a look at my base Entra ID Dynamic Device Group
- Create a new Autopilot Deployment Profile with your preferred deployment method – I like to utilize self-deploying, but either will work as long as your hardware is supported.
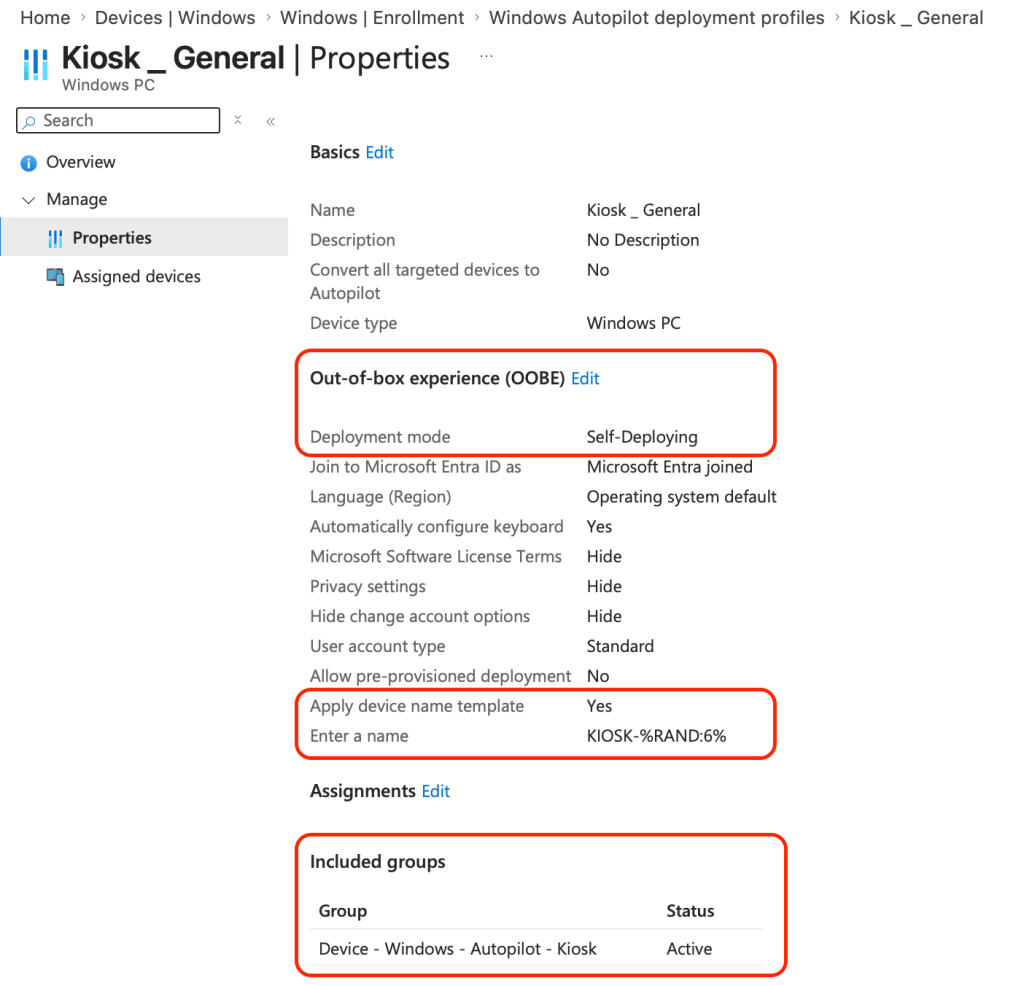
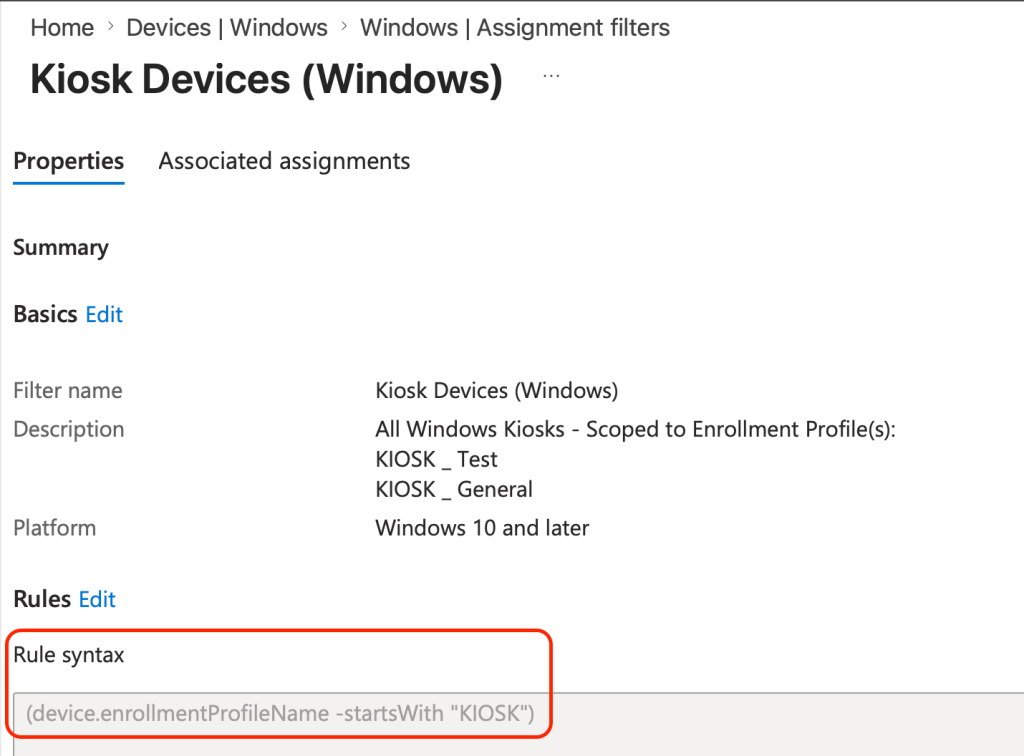
- Device filter based on the Autopilot Deployment Profile name created above (you can also use device categories if you prefer)
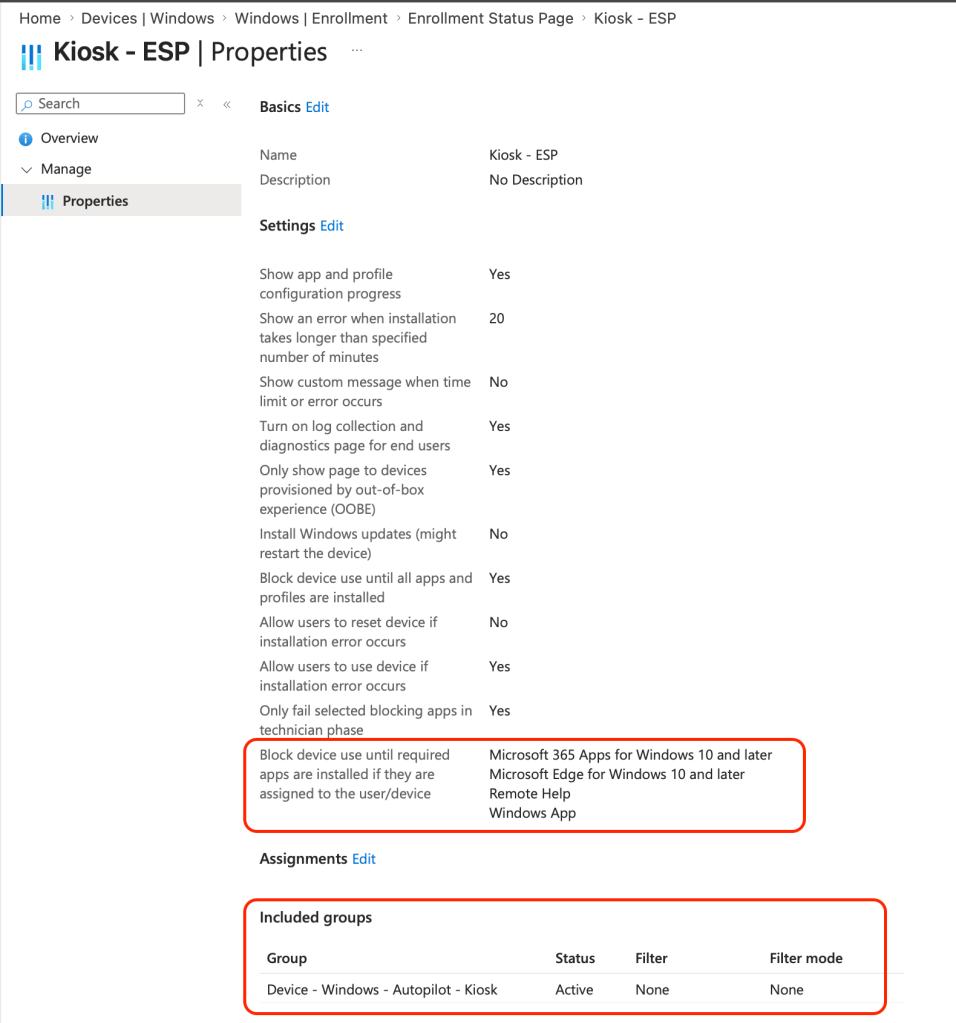
- Configure a separate Enrollment Status Page (ESP) for kiosks with all required apps in the blocking list—if Intune can’t see them installed, the XML never applies during the enrollment device configuration step.
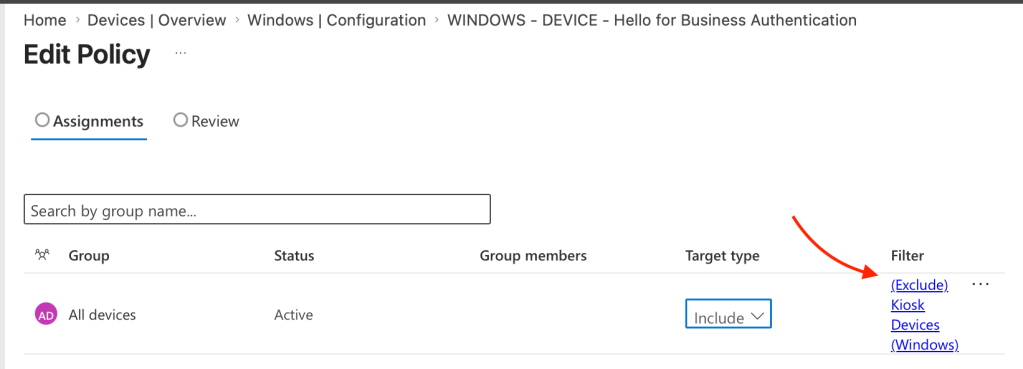
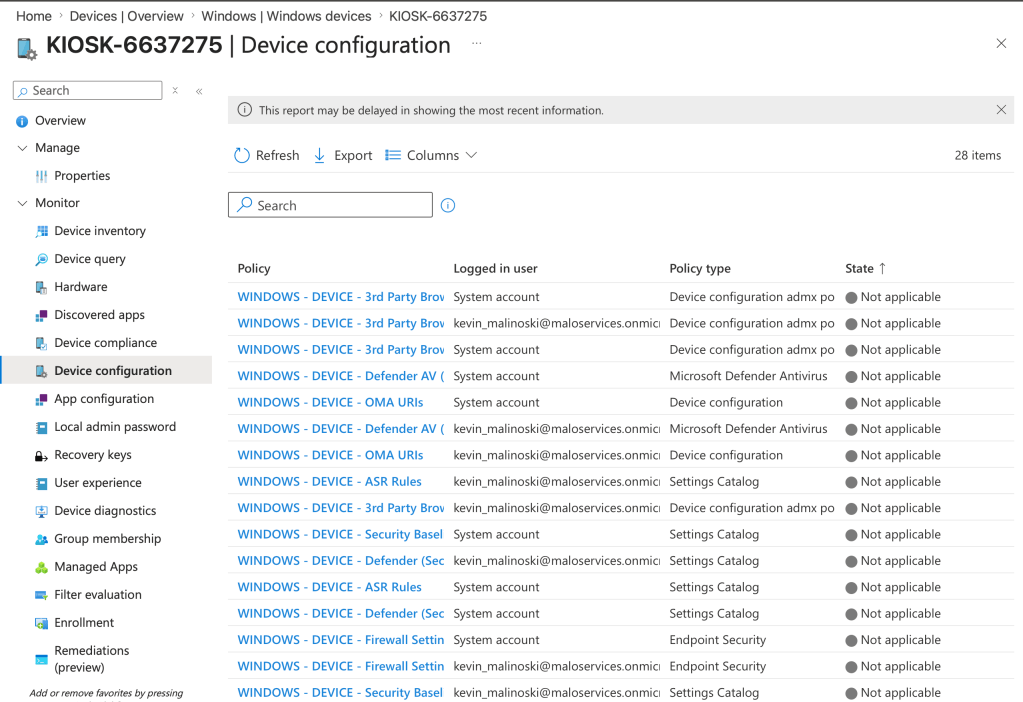
- Use device assignment filters to exclude these devices from your production CSPs to ensure no ‘silent conflicts – Microsoft does not recommend using applying and CSPs as Assigned Access comes bundled with its own policy set
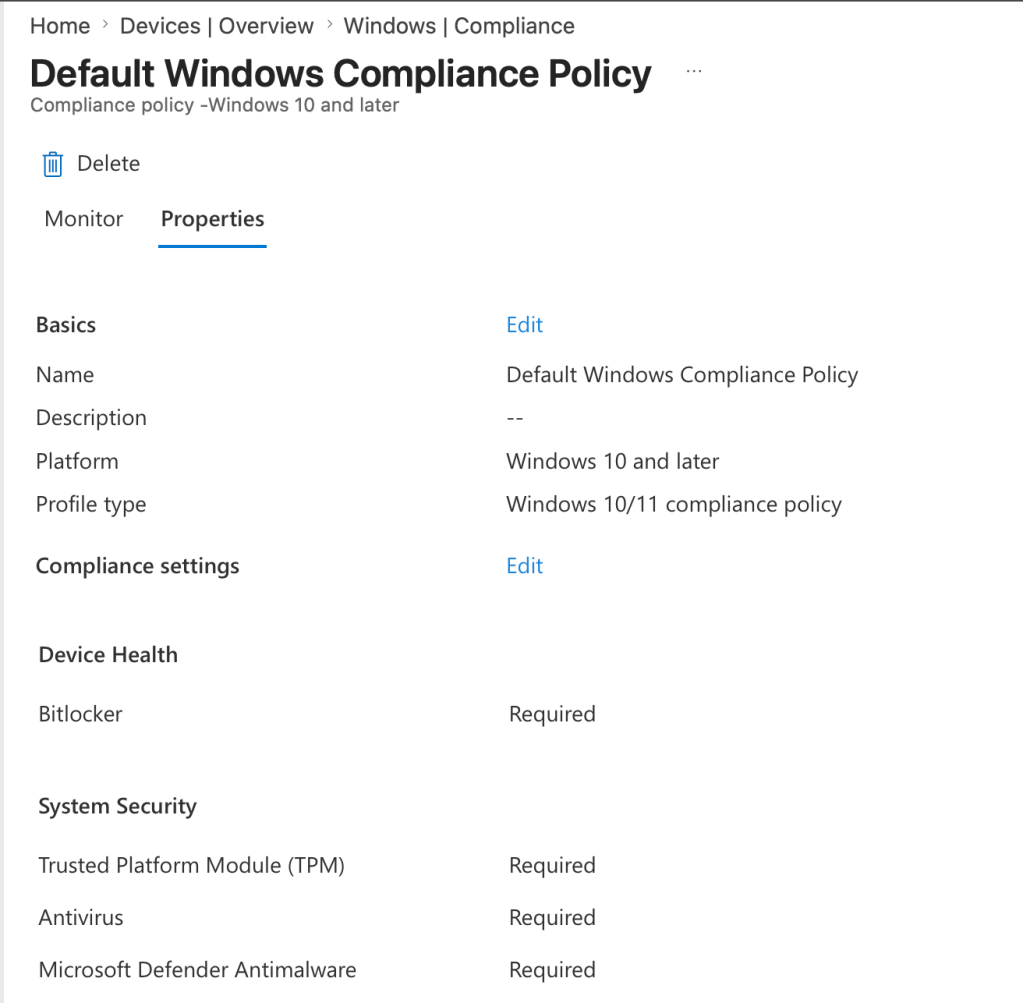
- Compliance Policy – enforcing password requirements are one of the things that will break Auto-logon for kiosks, this is literally the cornerstone of the kiosk experience. Make a dedicated compliance policy if needed you have one enforcing password requirements – exclude through the device filter.
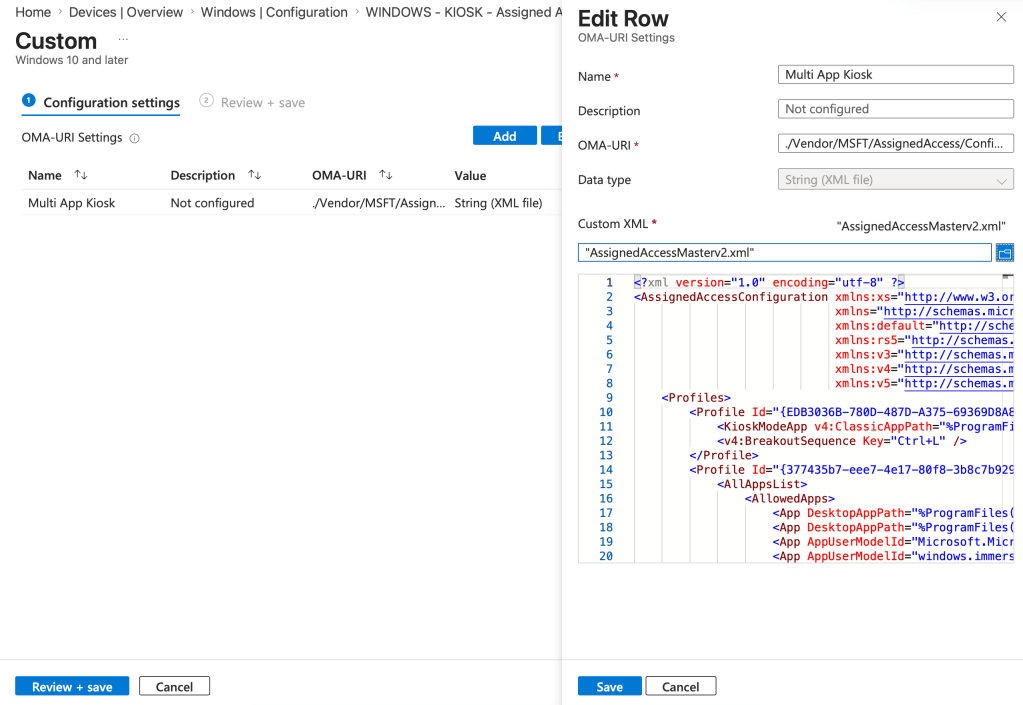
- Finally – an OMA-URI custom profile with your polished XML, targeted to the proper Entra device group.
OMA-URI: ./Vendor/MSFT/AssignedAccess/Configuration
Data type: String (XML File)
Get this foundation right and the device lands cleanly in kiosk mode instead of fighting ghosts later on down the road – below is a screenshot that will show the filtered polices for All Devices ass.
Phase 3 – The Magic Trick: Zero-Touch Provisioning That Actually Works (Velocity Achieved)
Now the payoff. Tag a test device with “MALO-KIOSK”, run it through AutoPilot, and watch it just work.
Self-deploying (if licensed) or user-driven with a service account—both are fine once the prep is done. You’ll finally be able to walk away from these machines without constant babysitting.
Quick gotchas:
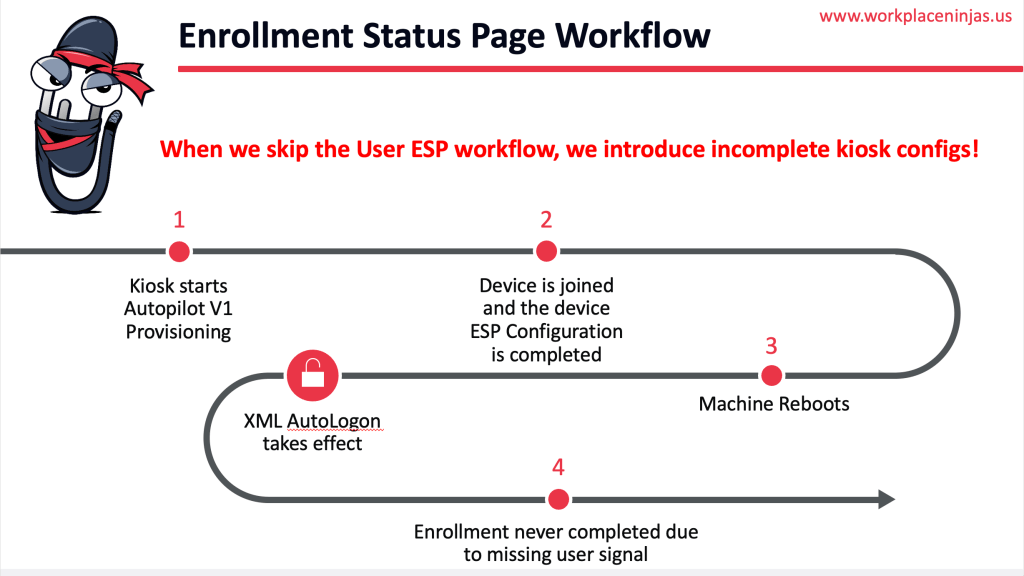
- Skipping User ESP or mid-provisioning reboots?
Make sure the provisioning user logs in at least once so Intune gets the proper signals (especially for Windows Update). - Always validate end-to-end on fresh hardware before scaling.
- If you are doing user-driven deployment, then I highly suggest that you log into the deploying user’s desktop – this confirms that the whole ESP was processed and prevents surprises later down the road.
Below is a slide I shared at the Workplace Ninjas US meet-up in Boston the other week:
When it works—and it will work if you follow the three phases—you can finally deploy new kiosks at real velocity.
Closing Thoughts from the End of Assigned Access April
We’ve covered local testing, XML mastery, CSP strategy, community stories, and now this complete three-phase process. If even one of these posts helped you understand how Assigned Access is supposed to work, then the whole month was worth it.
Too many teams and MSPs have quietly walked away from this technology because the path wasn’t clear. My hope is these posts (and especially this final one) become your permanent reference so you don’t have to learn the hard way—and so you can start moving faster once the groundwork is in place.
I’m still excited about the future of Assigned Access—AI experiences, robotics, you name it I can see there being an application. My one ask of Microsoft: let’s move beyond old-school logins and give us better native controls for access on these devices. Passkey-backed frontline kiosks would be incredible.
Drop your questions or new use cases in the comments—the conversation doesn’t end just because April does.
Thank you for riding along this month. Assigned Access April is officially a wrap, but the real work of building reliable, low-maintenance kiosks (and doing it with velocity) continues.
— Kevin

Leave a comment