
The modern workspace approach for detecting & remediating McAfee AV through Microsoft Intune application packaging.

Managing Windows devices in an enterprise environment is challenging, particularly when devices from manufacturers like Dell, HP, and Lenovo come preinstalled with McAfee antivirus.
This software can disrupt zero-touch provisioning, conflict with corporate security solutions, and degrade system performance, reliability, and security, creating frustration for end-users and IT administrators alike.
This blog post provides a comprehensive, updated guide for automating the removal of McAfee AV for Intune administrators in 2025.
This approach iterates on earlier methods, such as those outlined by Tbone (https://www.tbone.se/2021/03/05/mcafee-cleanup-with-intune/) and SMB to the Cloud (https://smbtothecloud.com/the-moving-target-of-removing-mcafee-products-with-intune/), while addressing modern challenges and leveraging Intune’s capabilities for a more intuitive and efficient process.
Zero (or multi) Touch Provisioning?
Microsoft Autopilot enables organizations to deploy Windows devices with minimal user interaction, streamlining the setup process for employees. However, preloaded software like McAfee can disrupt this zero-touch experience by requiring manual intervention to remove or configure, undermining the automation benefits of Autopilot.
The McAfee Headache…
McAfee’s recent updates to the MCPR tool have removed silent removal capabilities, creating significant challenges for IT administrators, especially in the “work from anywhere” era where automation is critical for managing remote endpoints.
As SMB to the Cloud discovered,
“….Whatever [McAfee] changed in the newer versions of mccleanup.exe disallows us from launching it on its own from the command line. It appears it needs to be launched from McClnUI and you need to use the GUI.
So, to summarize, download the MCPR utility. Then Extract with 7zip or a comparable program….”
The Updated Approach for 2025
PowerShell Syntax Updates
Logging enabled
The below initializes the log location – in alignment with other Intune Management logs. This will help to iterate on this process in the future.
$LogFile = "C:\ProgramData\Microsoft\IntuneManagementExtension\Logs\McAfeeRemovalLog.txt"
Additional MCPR removal arguments
Updated arguments with new McAfee AV services that have been added in later versions – primarily ‘WPS‘.
$programArg = "-p StopServices,MFSY,PEF,MXD,CSP,Sustainability,MOCP,mc-fw-host,MFP,APPSTATS,Auth,EMproxy,FWdiver,HW,MAS,MAT,MBK,MCPR,McProxy,McSvcHost,VUL,MHN,MNA,MOBK,MPFP,MPFPCU,MPS,SHRED,MPSCU,MQC,MQCCU,MSAD,MSHR,MSK,MSKCU,MWL,NMC,RedirSvc,VS,REMEDIATION,WPS,MSC,YAP,TRUEKEY,LAM,PCB,Symlink,SafeConnect,MGS,WMIRemover,RESIDUE -v -s"
Automatic retry based on return code
Throughout testing it was discovered that this iteration of MCPR works best silently when ran twice, if there is a non-zero error code returned. During debugging an error code of ‘3‘ indicated that there were left over components, while an error code of ‘2‘ seemed to indicate that the system needs to be rebooted to complete the process.
Looping the install to run twice provided the best results in my lab testing as McAfee has no public documentation for reference for their exit codes that could be found during development – please feel free to reach out if you have any information that you can share regarding McCleanup.exe exit codes!
if ($process.ExitCode -ne 0) {
            Write-Log "McCleanup.exe failed with exit code $($process.ExitCode) - executing MCPR a second time"
            $process = Start-Process $program -ArgumentList $programArg -PassThru -Wait -NoNewWindow
            Write-Log "McCleanup.exe finished reattempt with exit code $($process.ExitCode)"
        }
Intune Staging
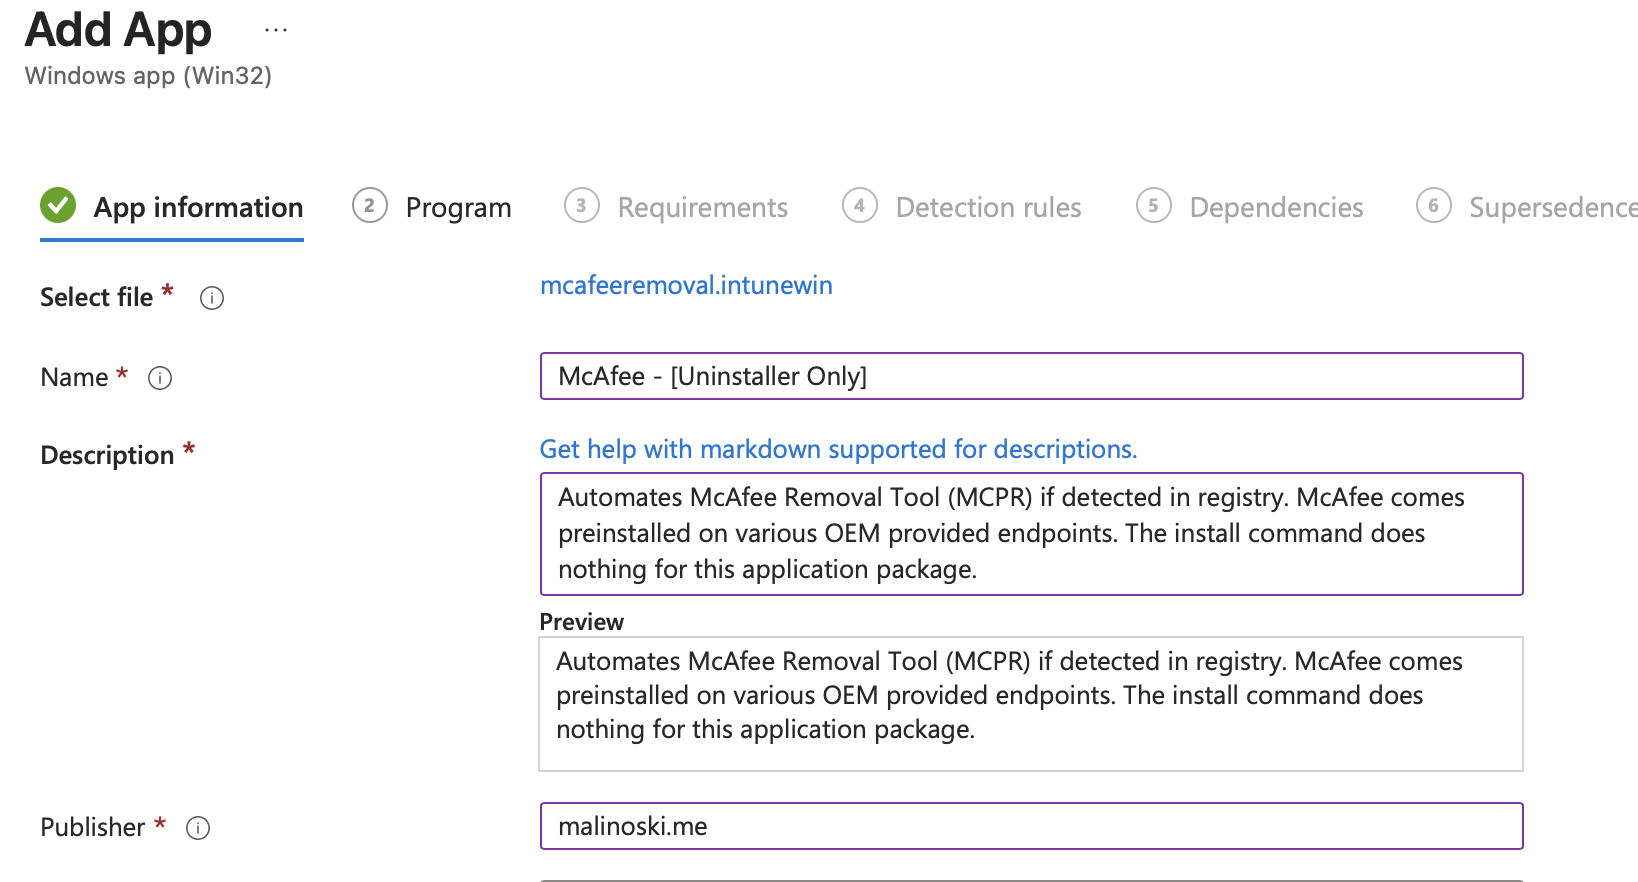
If desired, you can manually package the Win32 Application using the MCPR-SOURCE-FILES.zip file on my GitHub. This repository contains all files needed once extracted, including the needed PowerShell file.
Alternatively, you can download the fully pre-packaged Win32 app: https://github.com/kevinmalinoski/Intune-Blog-Resources/blob/main/McAfee%20Removal/mcafeeremoval.intunewin
- Upload the ‘mcafeeremoval.intunewin’ Win32 File
- Define Program Settings:
Install Command:cmd.exe /c
Uninstall Command:powershell.exe -execution bypass .\mcafeeremoval.ps1
- Detection rules – Registry keys exist
HKEY_LOCAL_MACHINE\SOFTWARE\McAfee
- Assignments:
Uninstall – All Devices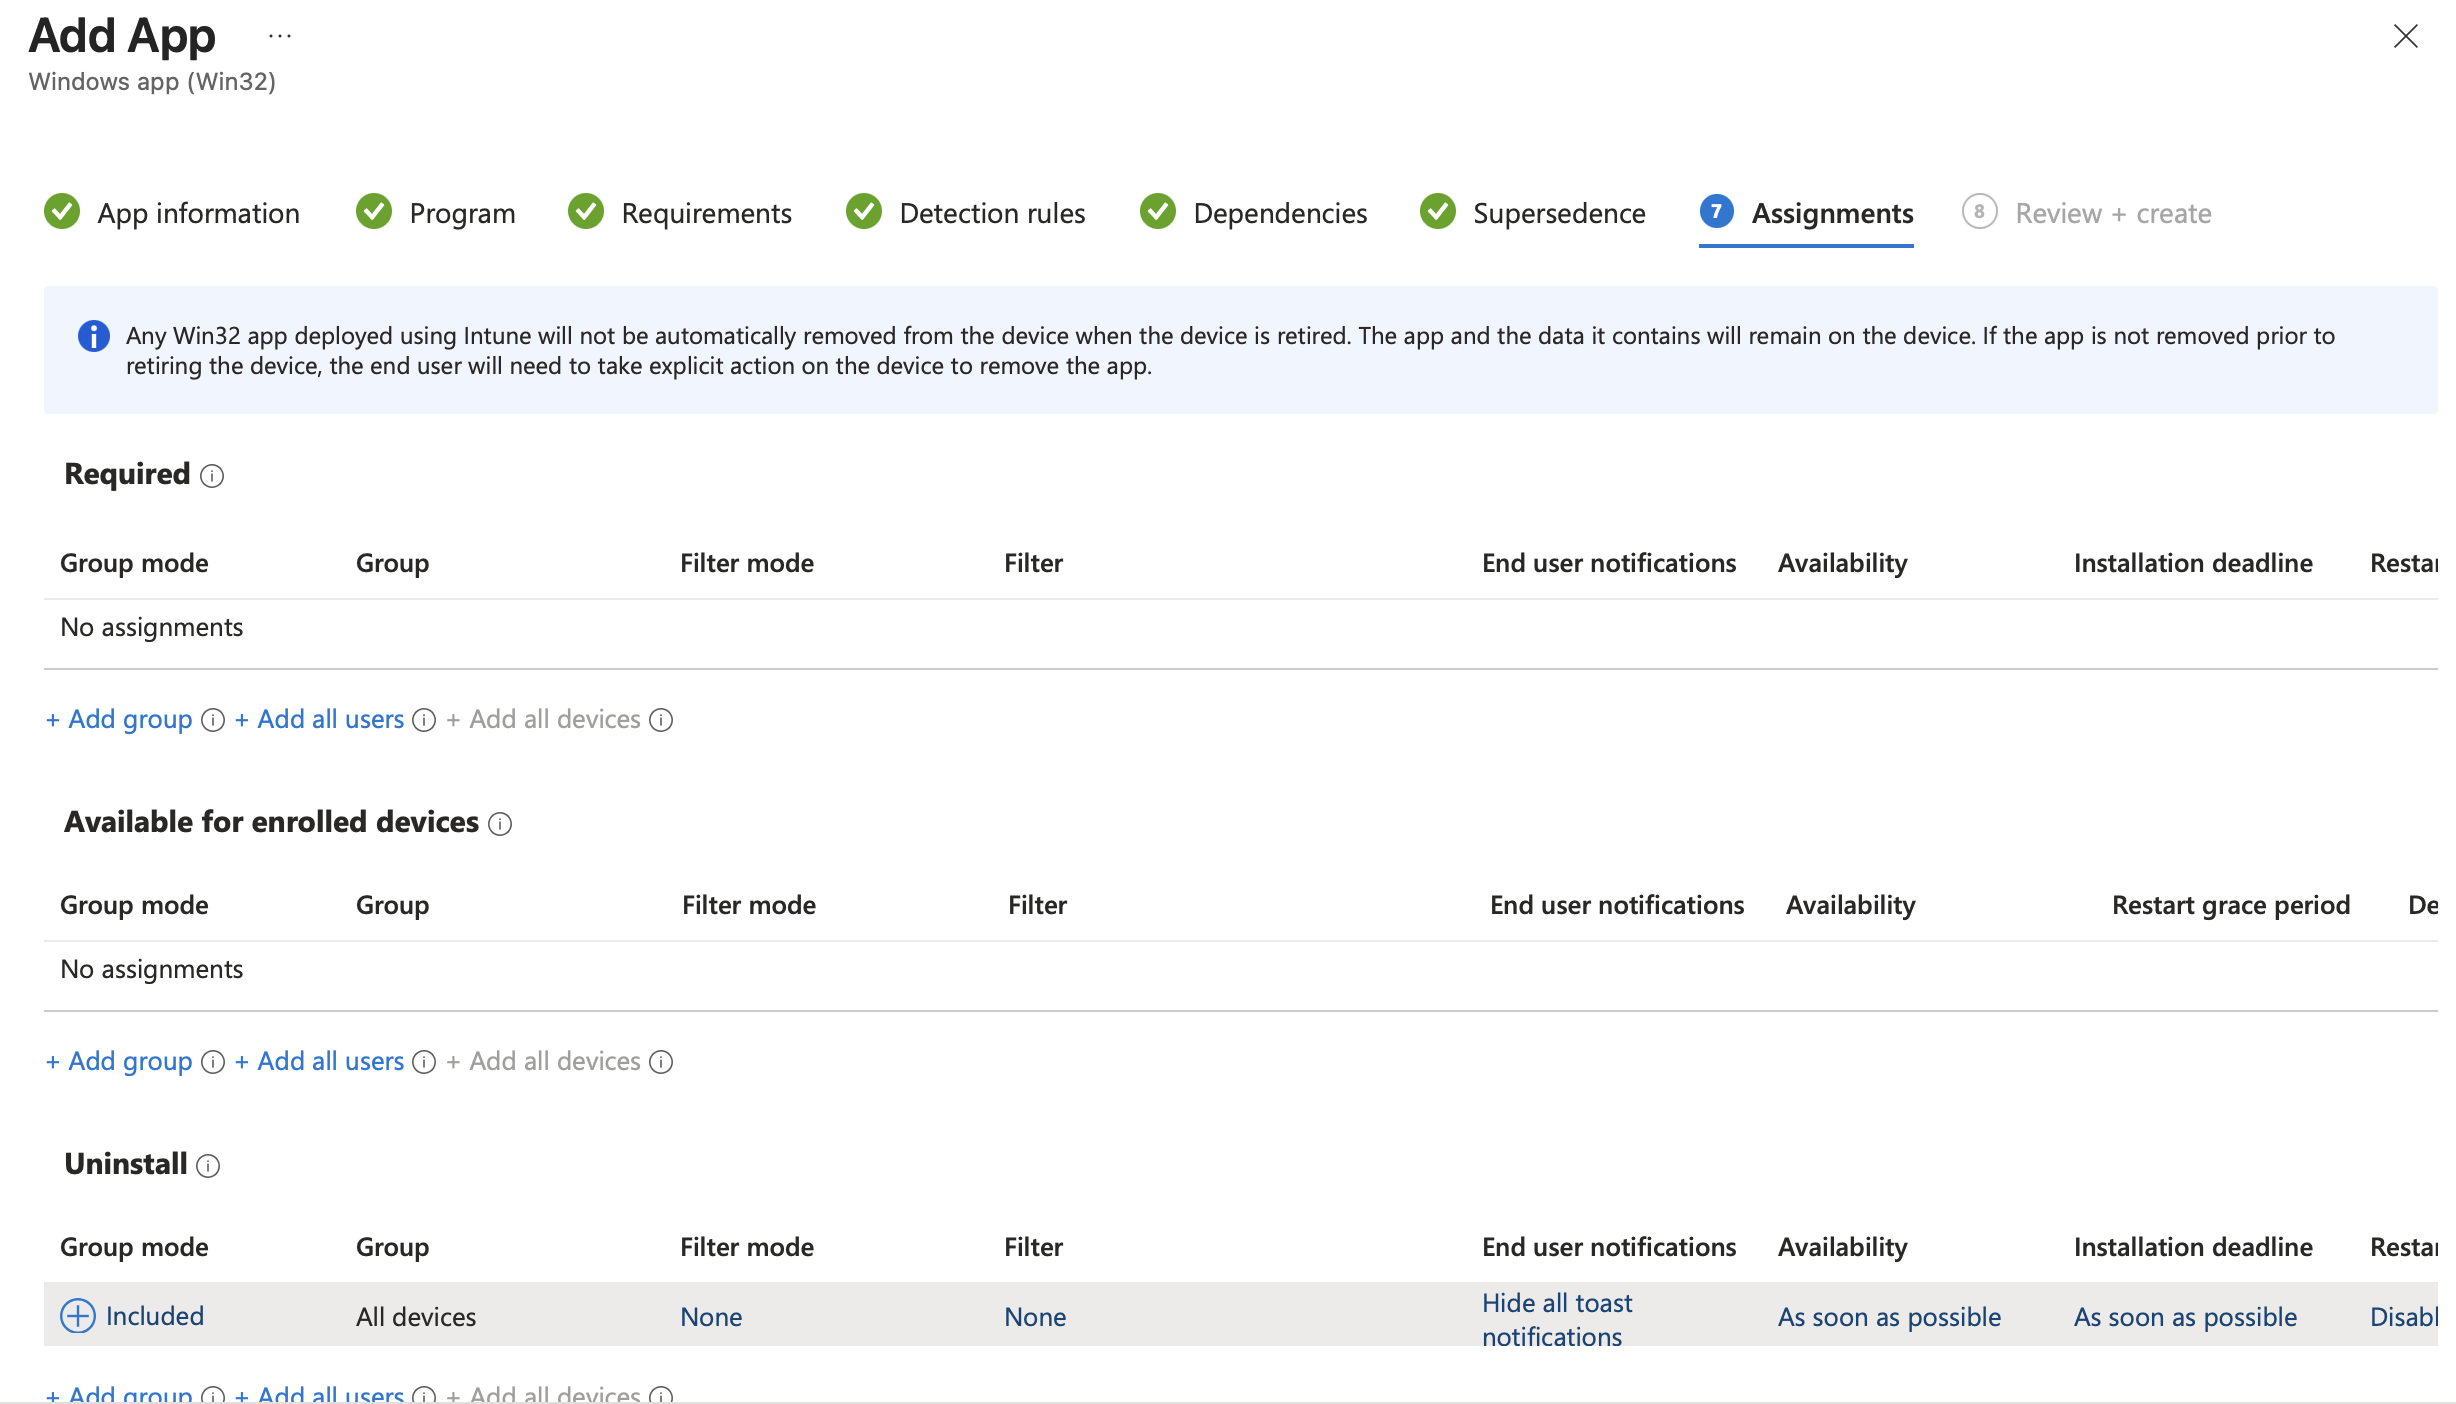
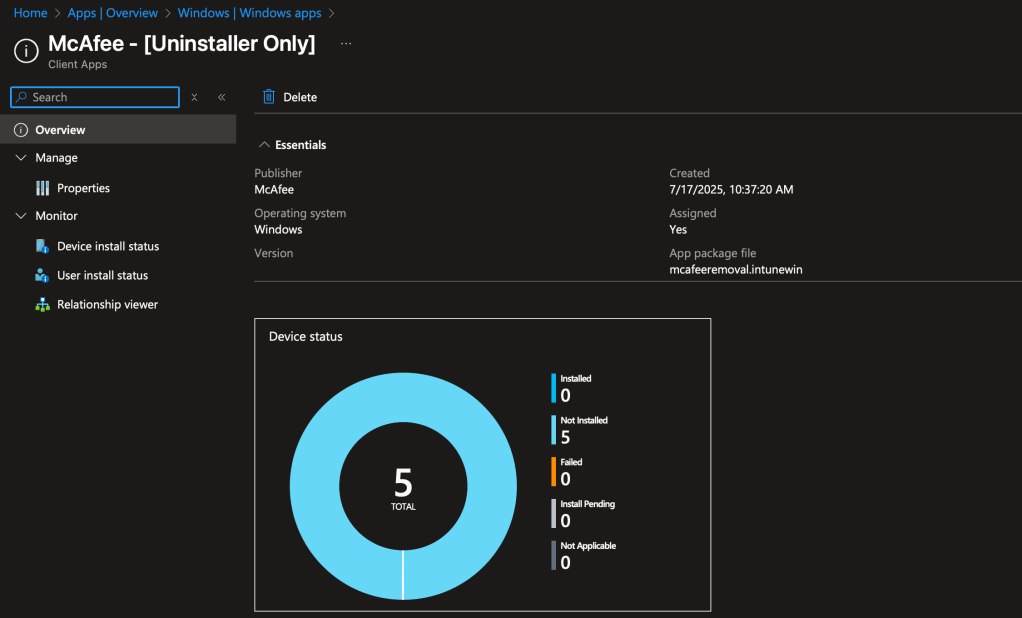
After uploading the application, monitor your devices through Intune as they check-in and receive the Win32 assignment for Uninstall.
Within 24-48 hours devices will start reporting back to validate the status of McAfee and silently remove as needed.
In conclusion…
By following the steps in this guide, you’ve got a clear path to streamline McAfee removal in Intune, paving the way for a cleaner, more efficient security setup. As we approach 2026, mastering these processes is more critical than ever—IT environments are evolving, and staying ahead means being adaptable and prepared. I hope this guide has given you the tools and confidence to tackle this task head-on. Ready to put it into action?
Give it a shot, and if you run into any snags or have questions, feel free to drop me a line on LinkedIn!

Leave a comment